

Everything in this chapter happens before the doors open. An event is one vote with its own voting link, entries, voters and results, so a judges’ award and a people’s choice award are two events.
Create your event
Events, Create event; then Settings, Basics
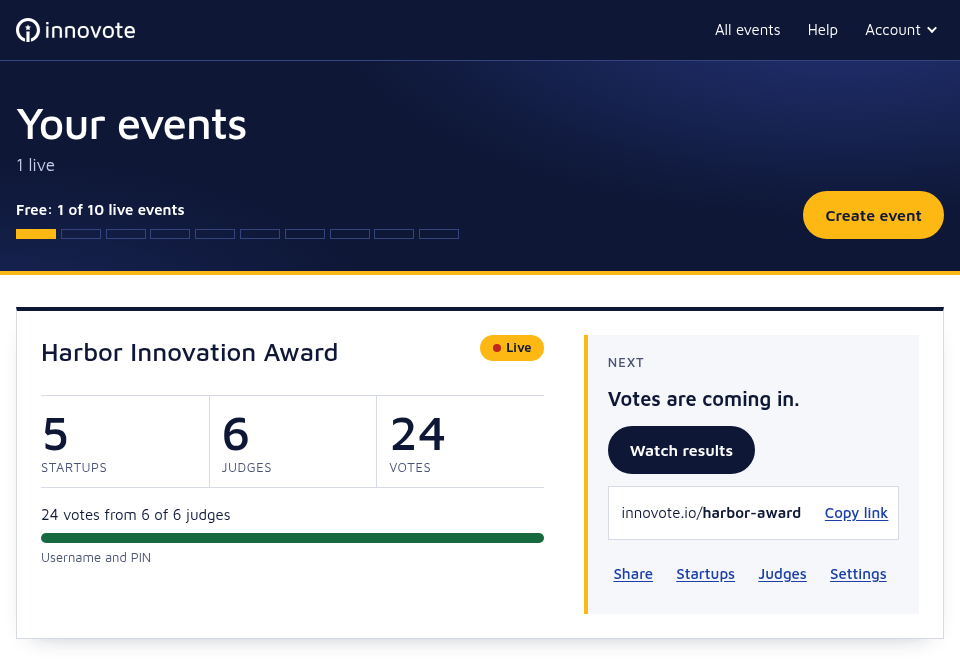
Your events list shows every event with its numbers and the next step.
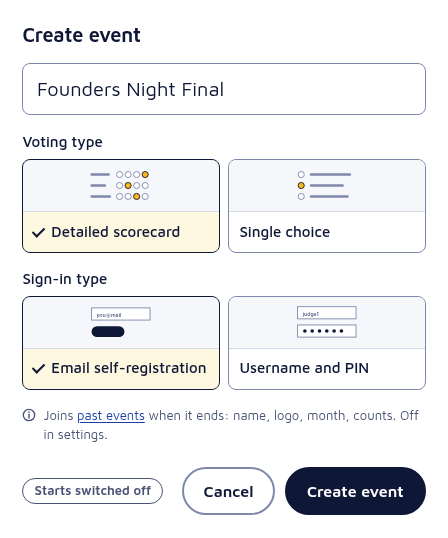
Press Create event. A dialog asks for the name, the voting type and the sign-in type (cues 1.3 and 1.2). You can change all of this later in the event’s Settings.
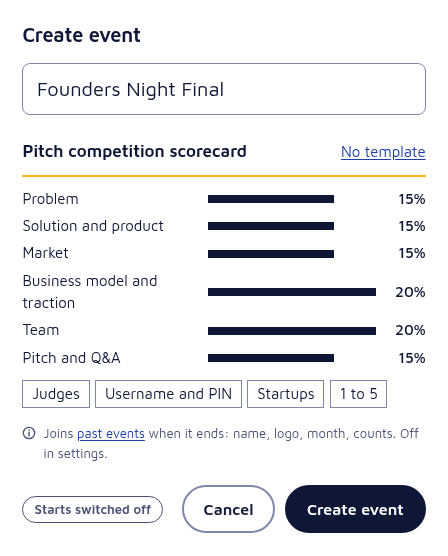
A template sets up a scorecard with weighted criteria for you: press Start with this template on your events list, or Start an event with this template on the page of the pitch competition scorecard or the hackathon judging criteria. The dialog then shows the criteria with their weights in place of the two choices, because the template decides them; No template brings the choices back. On a free account the dialog also says that the event joins the list of past events when it ends (cue 3.5).
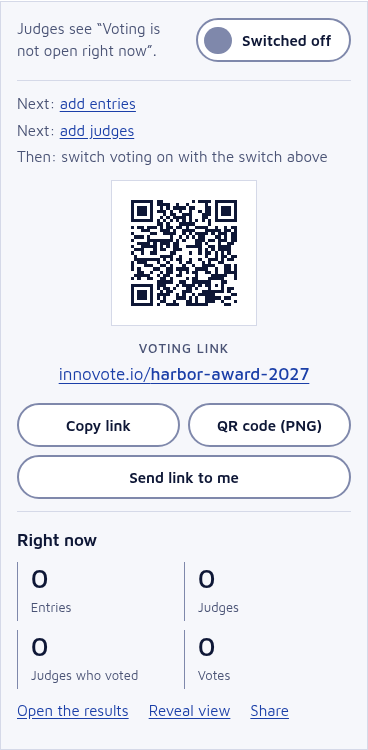
A new event starts switched off, so nobody can vote before you are ready. It opens in its settings, where the panel on the right lists what is next: add your entries (and your judges in a username and PIN event), then switch voting on with the Live switch.
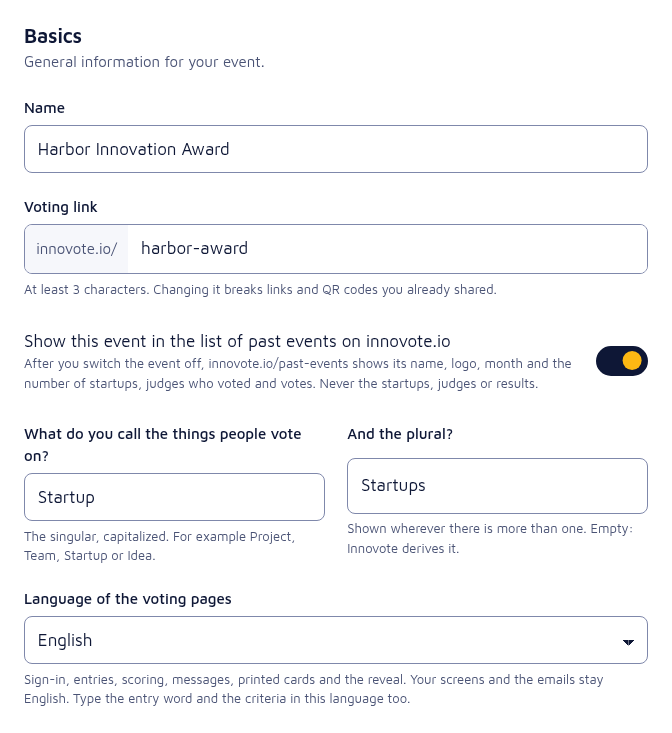
Settings are grouped in sections: Basics, Sign-in, Voting and rubric, Voter options (Judge options in a username and PIN event), Entry fields (named with your own word, for example Startup fields), Legal, Voting page and Manage. Basics holds:
- Name. The name of your event or award, shown on every voting page.
- Voting link. Innovote makes it from the name; you can change it to a short link that is easy to type, for example
innovote.io/foundersnight. It needs at least 3 characters, and a few words such asappandhelpare reserved. Changing it breaks links and QR codes you already shared. - What do you call the things people vote on? The word that fits your event, and its plural if Innovote should not derive it: startups, teams, projects, ideas. The voting pages and your Entries tab use it.
- Language of the voting pages. English, Deutsch, Íslenska, Español or Français, for sign-in, the entries, scoring, messages, printed cards and the reveal. Your screens and the emails stay English, so type the entry word and the criteria in the voting language too.
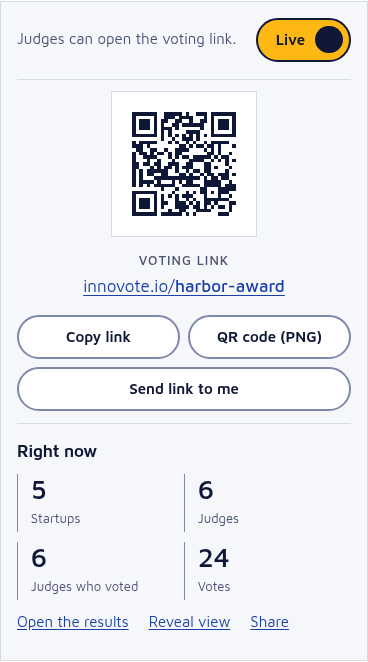
Live. The switch that opens and closes voting is at the top of the panel on the right of the settings (above them on a phone).
- It says Live or Switched off. While the event is live, people can open the voting link.
- It saves at once, apart from the settings form, and asks first before it switches voting off.
- Up to 10 events can be live at the same time, or 50 with the Own brand add-on. A new event and a clone start switched off: switch voting on when you are ready. Switched-off events do not count.
- On the other tabs a badge at the top right of the tab bar shows the same state: Live or Switched off.
The panel also holds the QR code, the voting link and the numbers so far.
Choose how people sign in
Settings, Sign-in
There are two ways in:
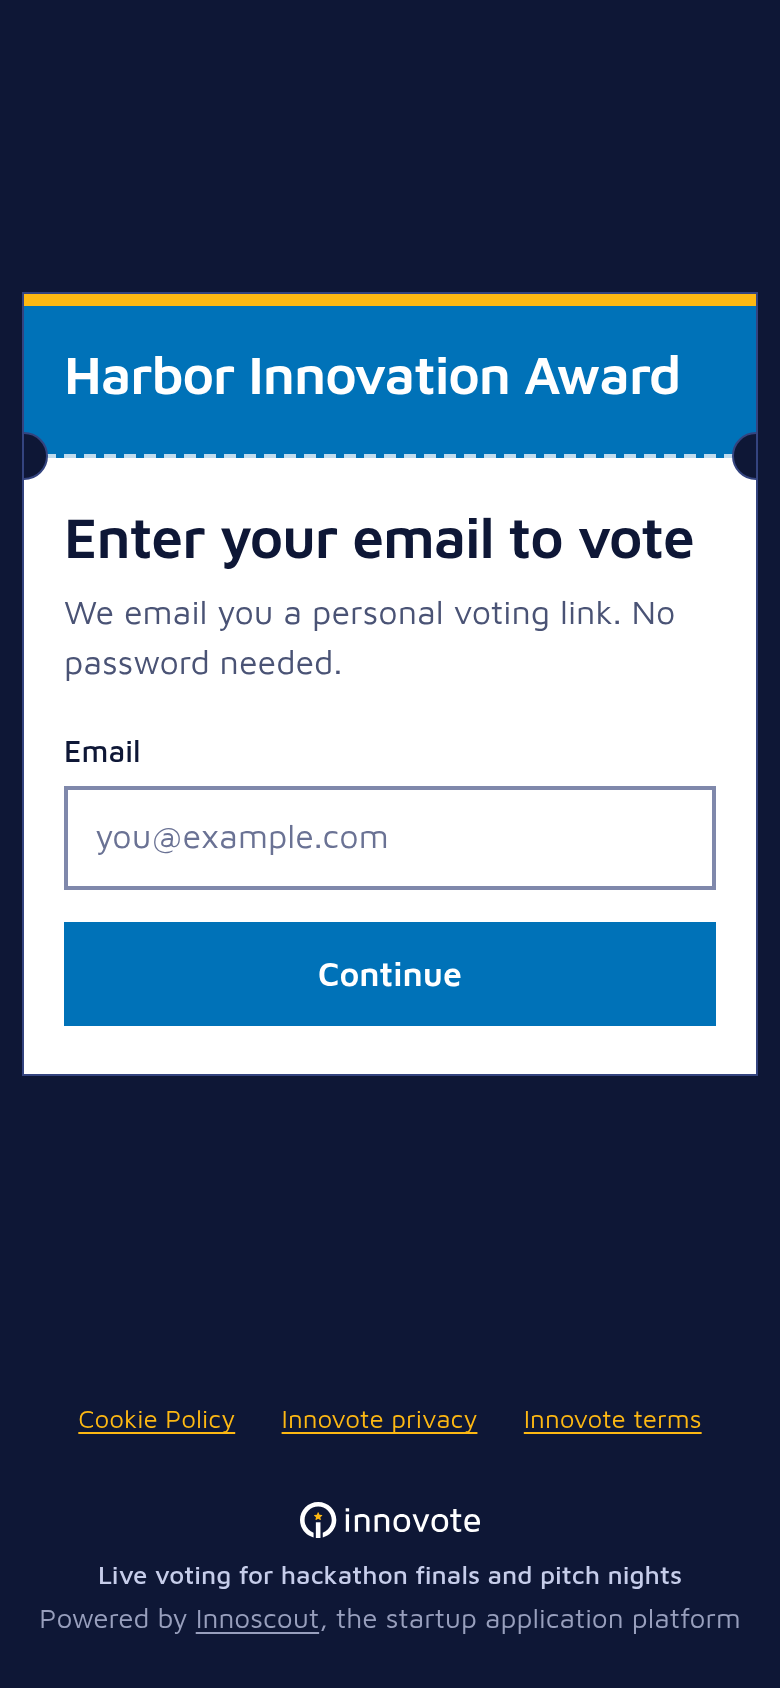
- Email self-registration (audience voting). Anyone with the link enters an email address and receives a personal voting link by email. Entering the same address again sends the same link again (at most one mail every 10 minutes per address), so each address has one ballot. Your screens call these people voters.
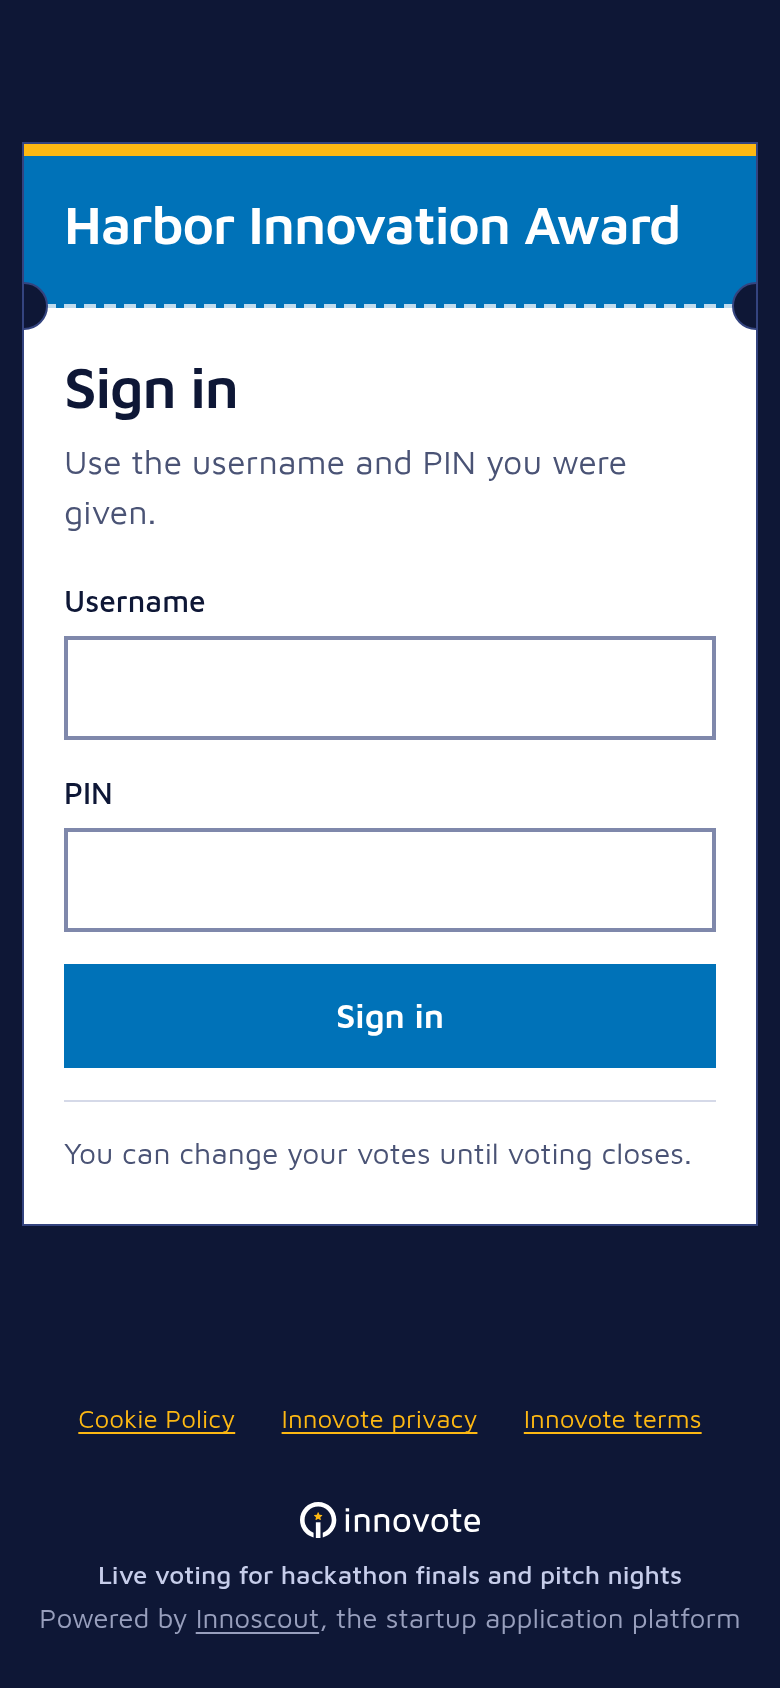
- Username and PIN (judges, a closed vote). You create a username and a PIN for each person on the Judges tab (cue 1.5), and only people who have one can vote. Your screens call them judges. The people who vote never see that word.
A jury and an audience at the same final are two events: one with usernames and PINs, one with email self-registration.
 Username and PIN
 Email self-registration
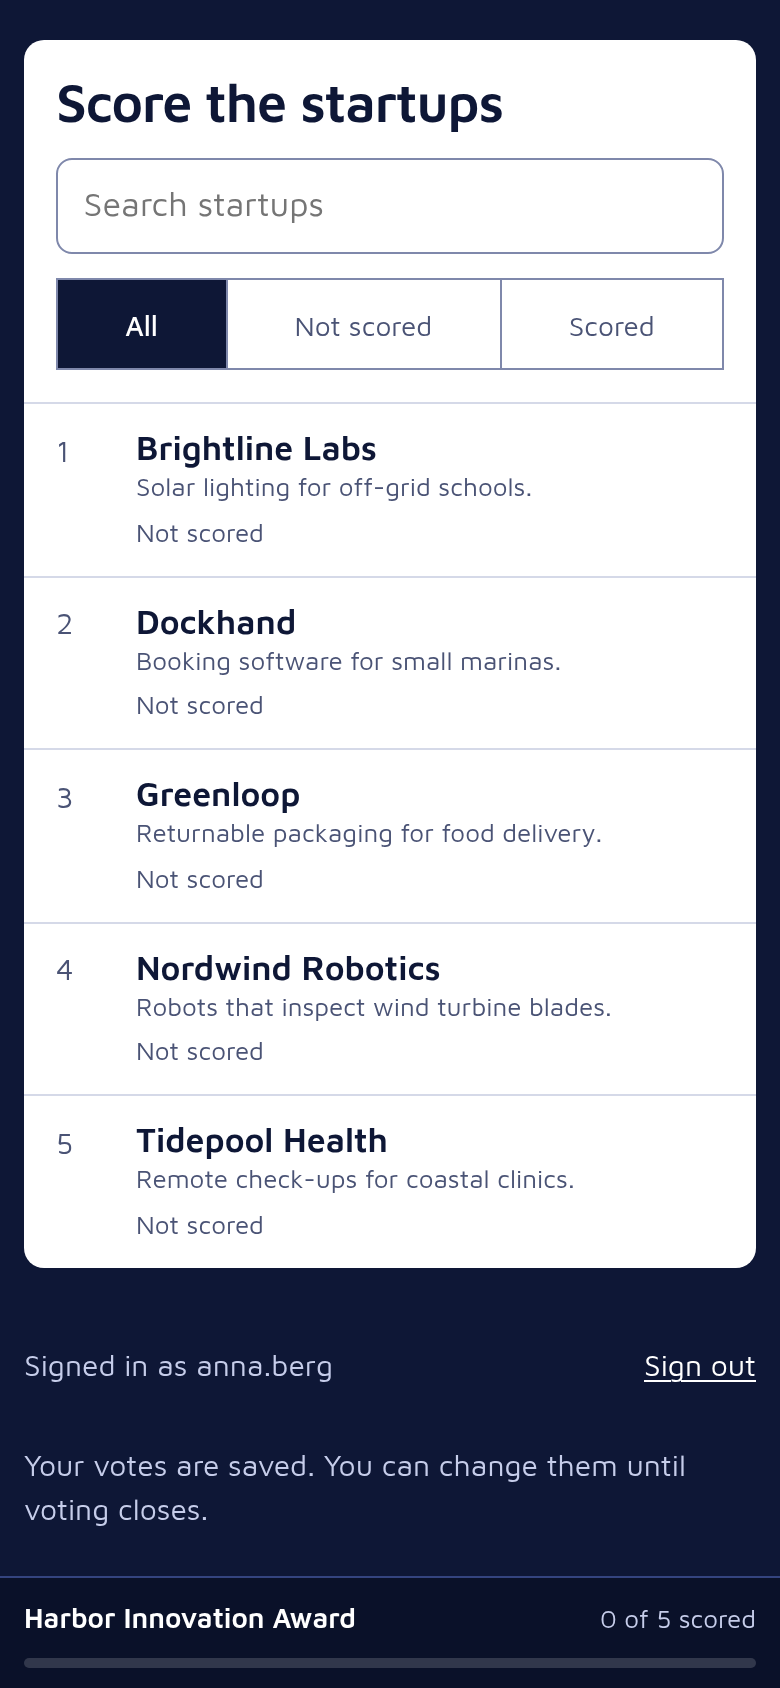 After signing in
Set up voting and criteria
Settings, Voting and rubric, and Voter options
Choose between two voting types.
Single choice (people’s choice): each voter picks one entry as the best. Voting again replaces the earlier choice.
Detailed scorecard (judges’ award): each voter rates every entry on a set of criteria, like a rubric.
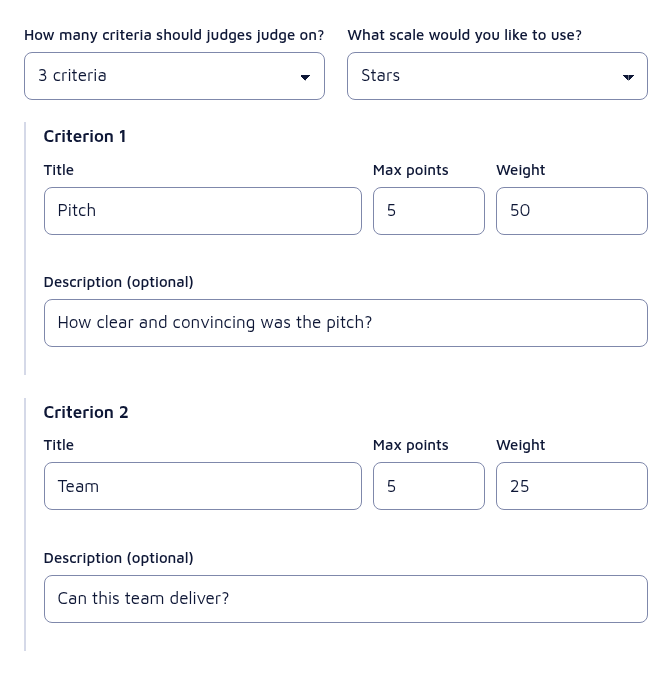
- Number of criteria. 1 to 10.
- Scale. Numbers, stars or smileys. Smileys show a face with its number under it: a frown for 0, a smile for the maximum and a straight face for every score in between (with the 0 option off there is no frown).
- Title and description. The title names the criterion, for example Product or Team. The optional description explains harder criteria or tells judges what a good score looks like.
- Max points. The highest score for this criterion, 1 to 10. The scale starts at 0, unless you turn on “Disable the “0” vote option”, and then the minimum is 1.
- Weight. Optional, 1 to 100. A criterion with weight 50 counts twice as much as one with weight 25, as long as both have the same max points (the total is not adjusted for different maximums). As soon as any criterion has a weight, criteria without a weight are left out of the total. If your weights add up to 100 they read like percentages.
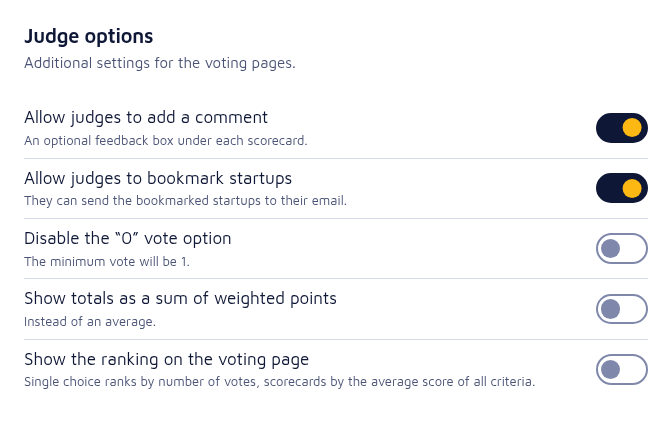
Voter options (Judge options in a username and PIN event):
- Comments. Voters can leave an optional comment under each scorecard. You read them on the Comments page and in the Excel file (cues 3.2 and 3.1).
- Bookmarks. Voters can bookmark entries and mail themselves the list.
- Show totals as a sum of weighted points. The total in the results is a sum of weighted points instead of an average.
- Show the ranking on the voting page. Off by default, so voters see no ranking until you decide. Turning it on asks first when you save (“Save these changes?”), and while it is on, your Results tab reminds you that the people who vote can see the ranking.
Comments and bookmarks belong to scorecards: saving a single choice event turns both off.
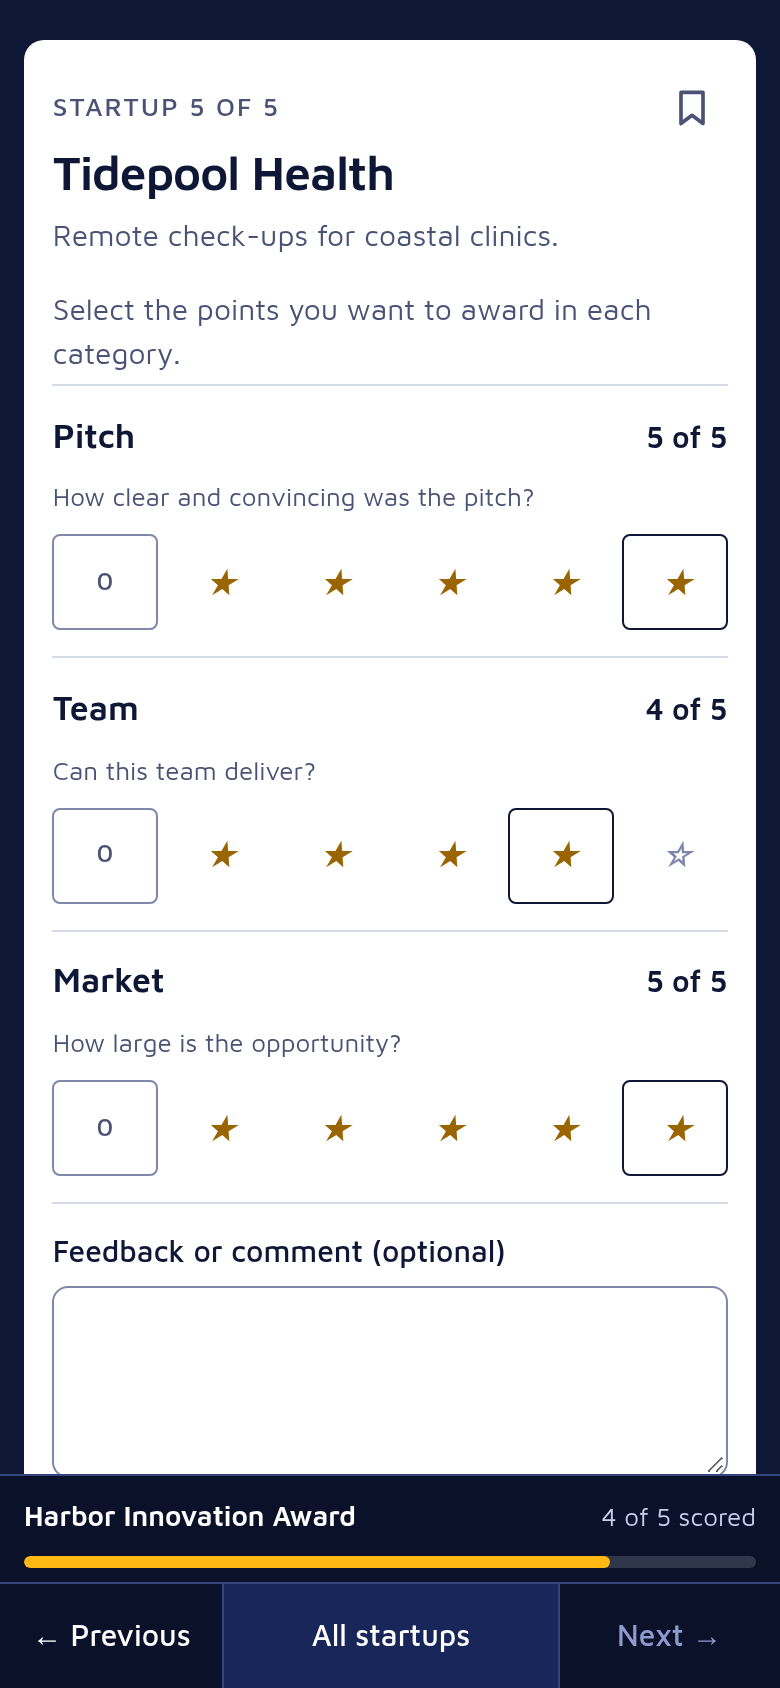
What voters do on their phone:
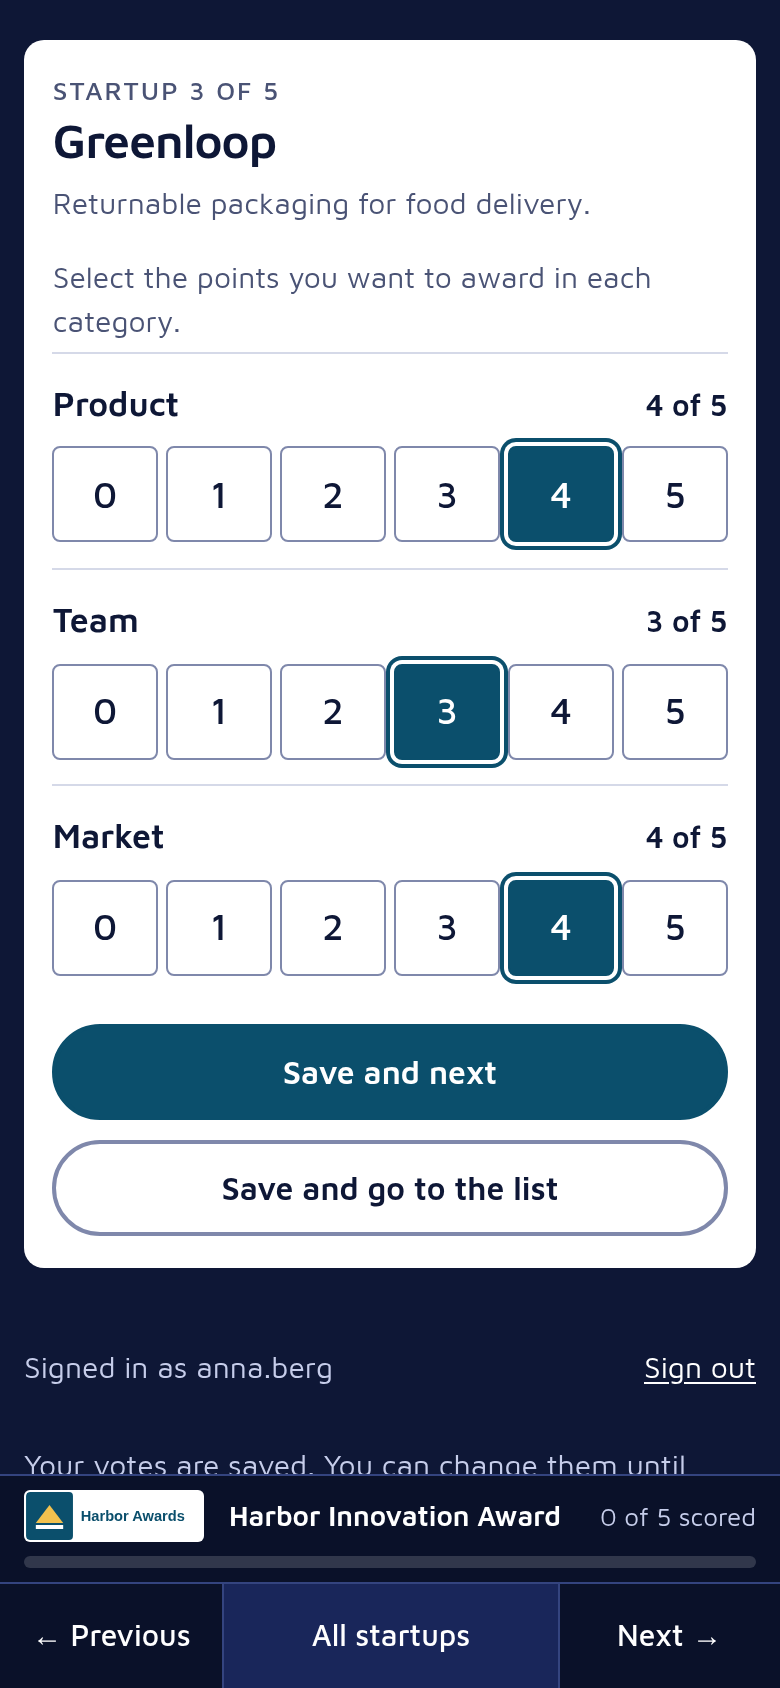
- Scorecard. The list shows every entry, with a search box and the filters All, Not scored and Scored (and Bookmarked when bookmarks are on). A voter opens an entry, picks a score for every criterion and presses Save and next, which opens the next entry without scores; Save and go to the list returns to the list.
- Progress. The bar at the bottom of the list and of each scorecard shows your event and how far the voter is, for example “4 of 5 scored”. Under it, a scorecard has Previous, All entries (with your own word) and Next.
- Single choice. The voter picks one entry in the list and presses Save your vote.
- Changes. Voters can change their votes until voting closes.
 Stars
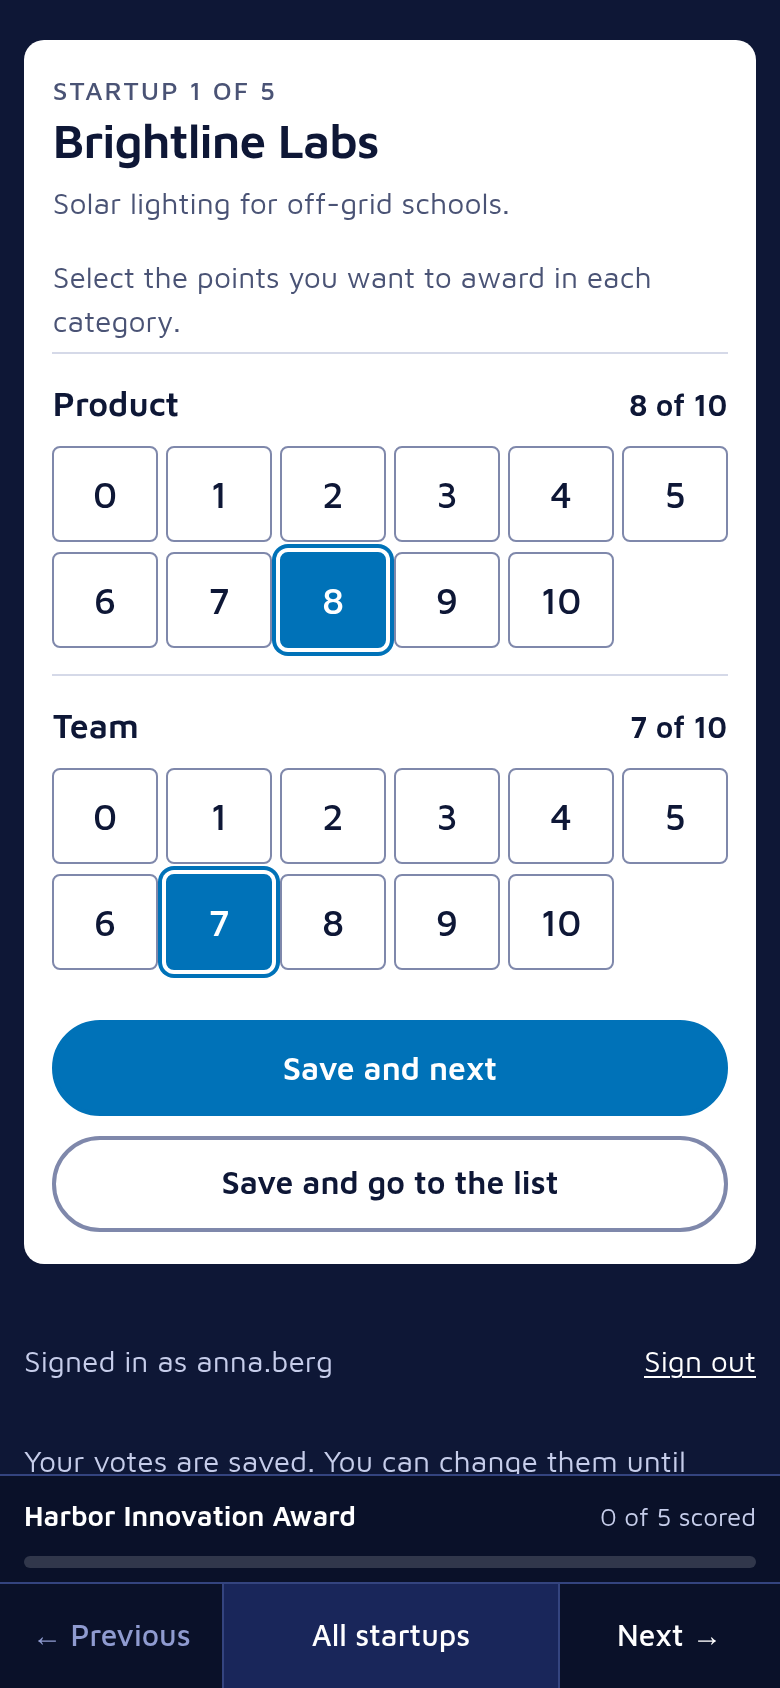 Numbers
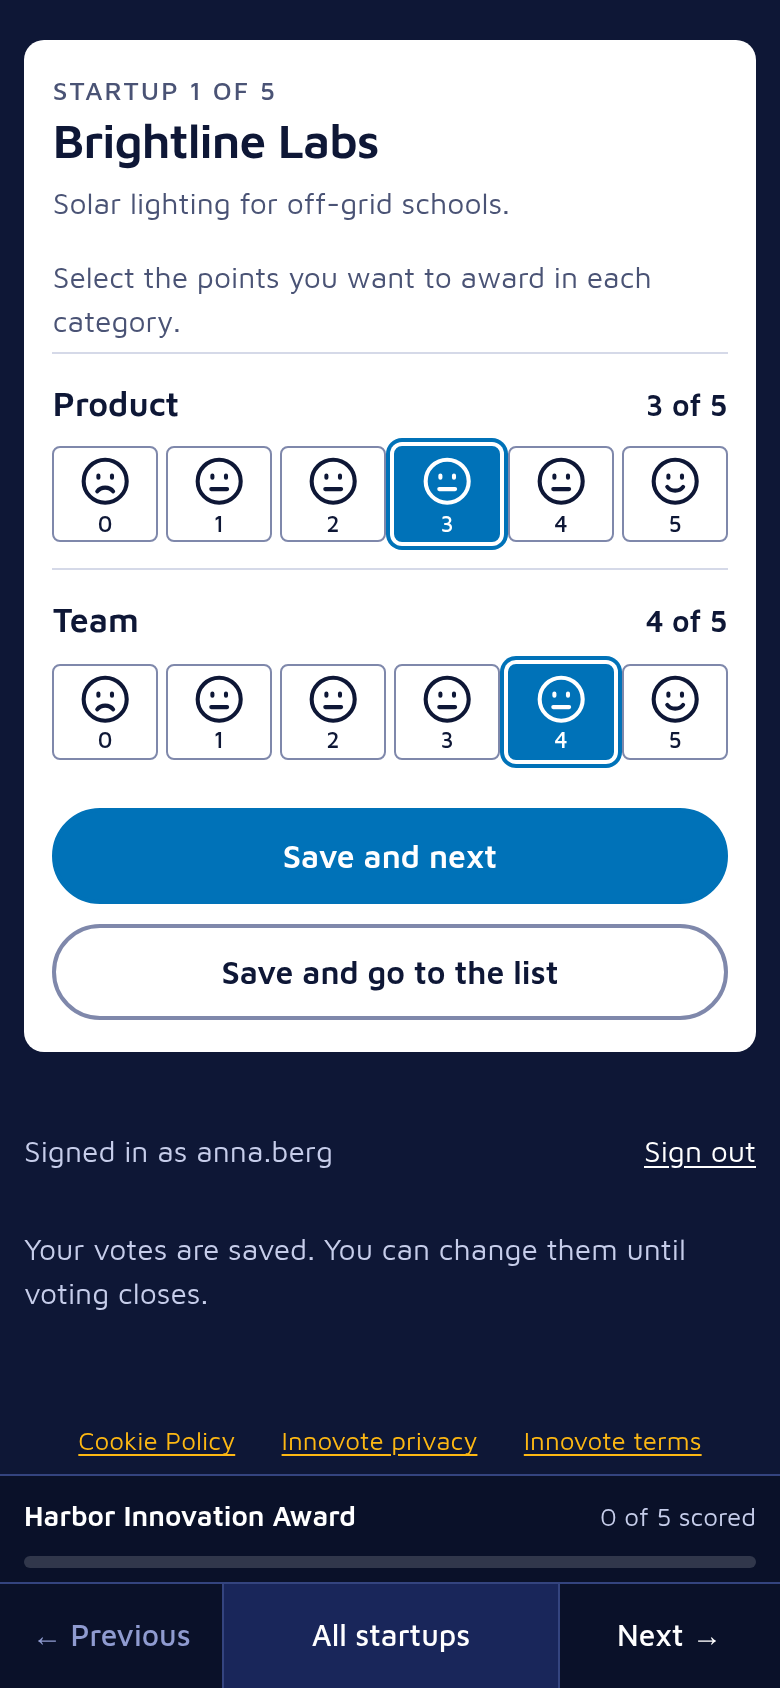 Smileys
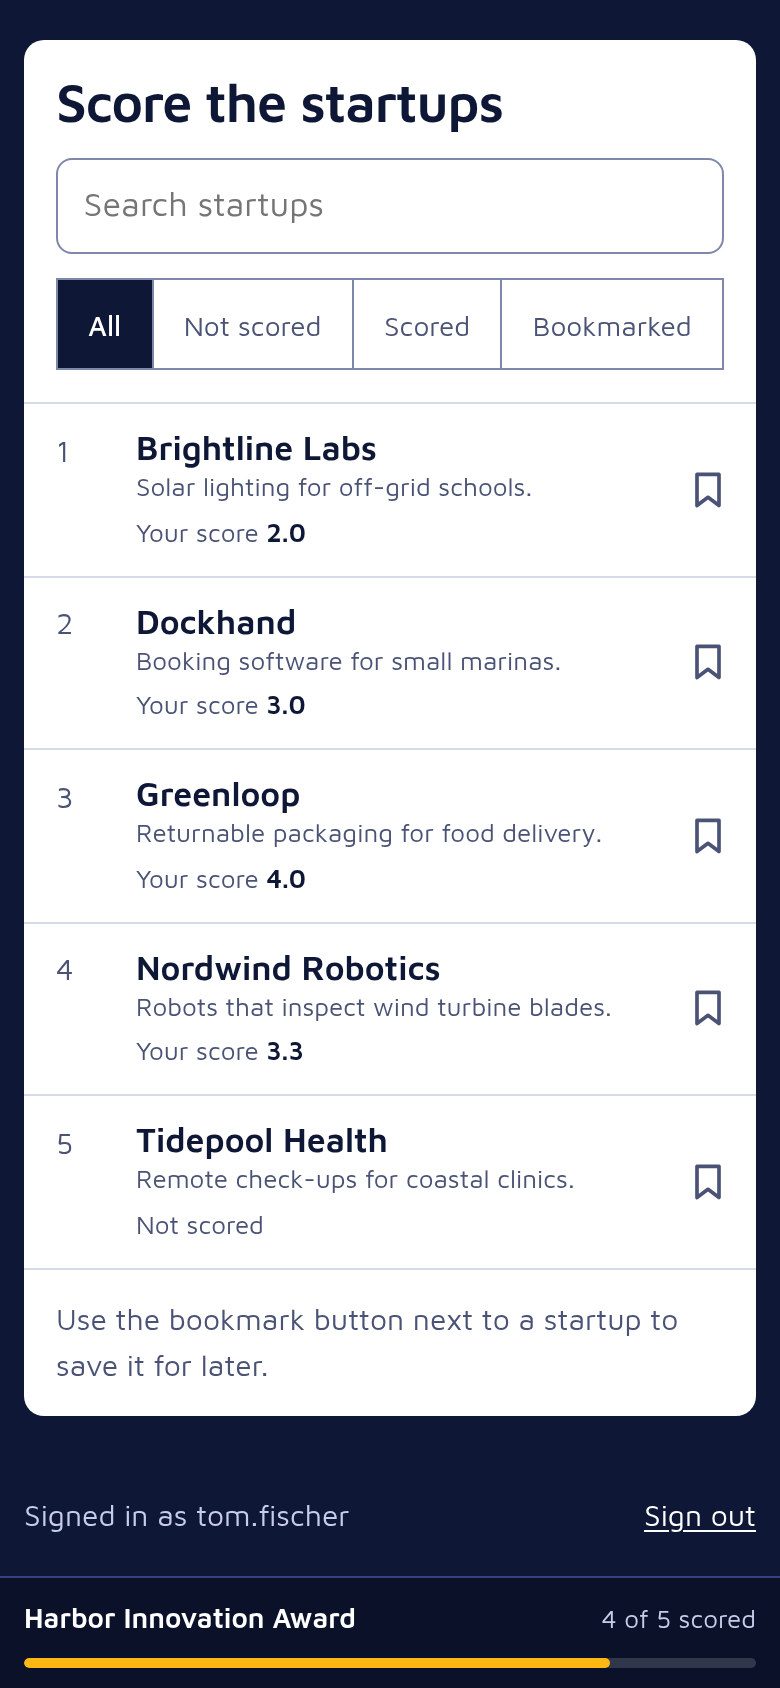 Scorecard list
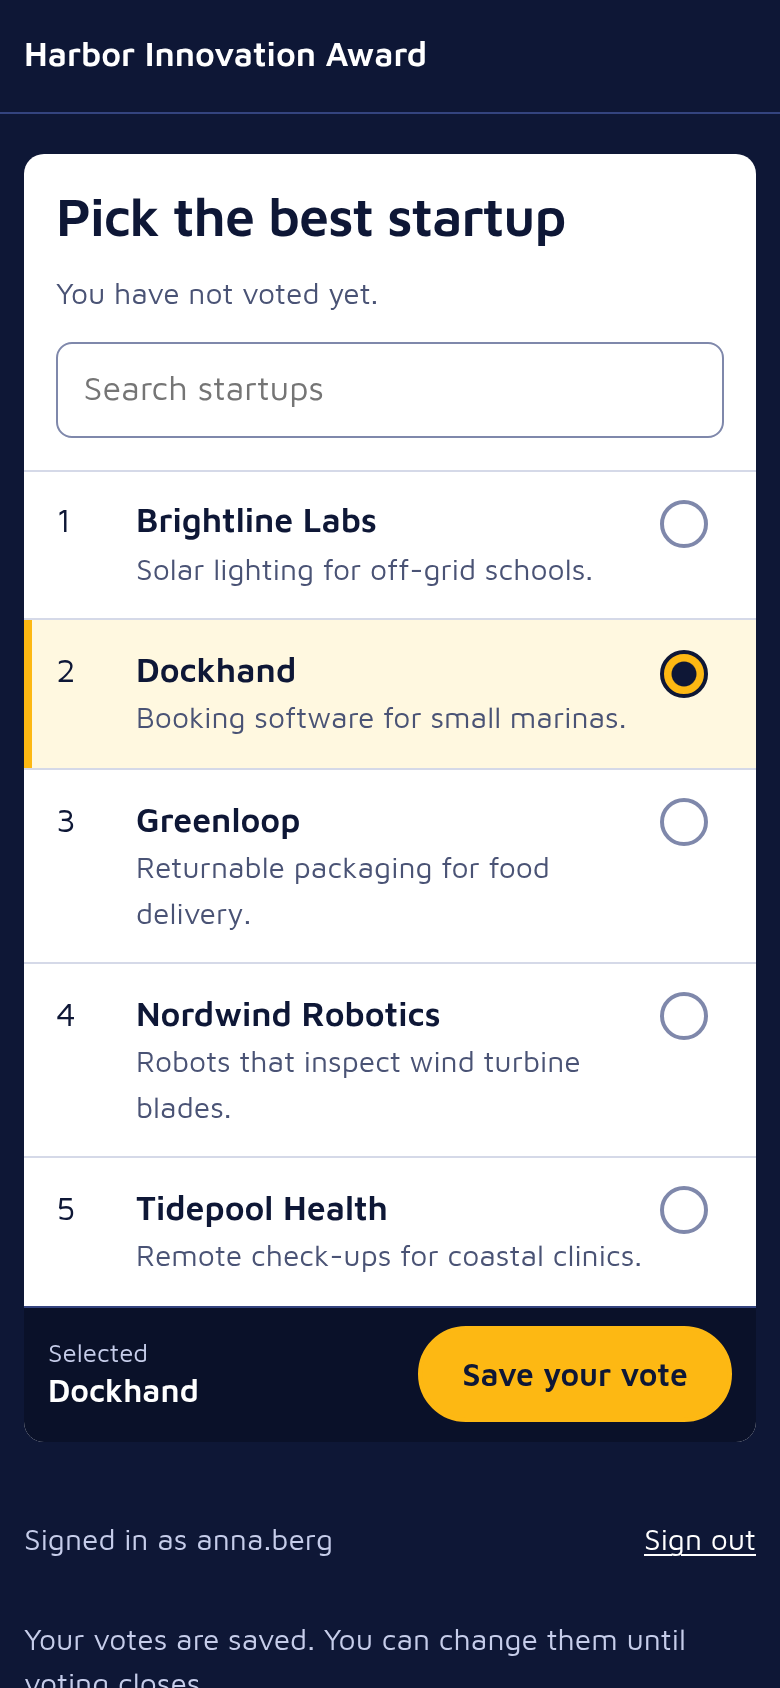 Single choice
Add your entries
Entries tab (named with your own word, for example Startups)
Entries are the teams, startups or projects people rate or choose between.
- Add. Adds a row and opens it for editing. Nothing is stored until you press Save in the bar at the bottom; Discard drops your changes.
- Name. A short name that says who is being voted on. Entries are shown alphabetically. To control the order, start the names with a number: “1. Startup A”, or “01. Startup A” if you have more than nine.
- Description (optional). A longer text that reminds voters who this is. It helps when judges vote after the pitches, not during them.
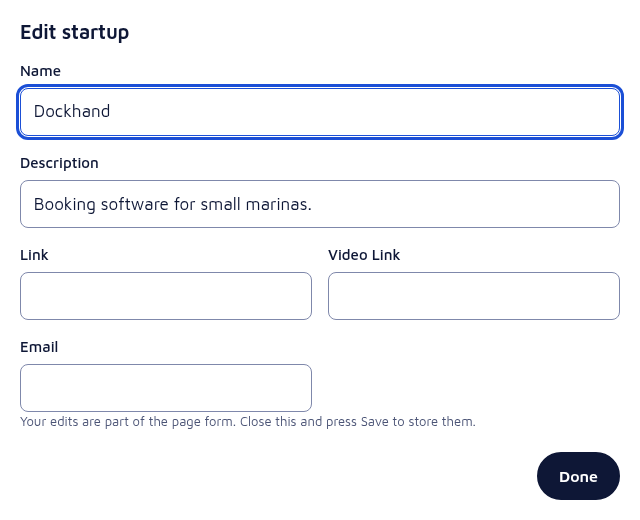
- Edit opens the fields of an entry: name and description, and a link and a video when you turned them on. Entry fields at the top of the tab opens that part of the settings. The email field shows only while “Activate the application form” is on.
- Remove marks an entry; it is removed when you save, together with its votes. Until then Undo brings it back.
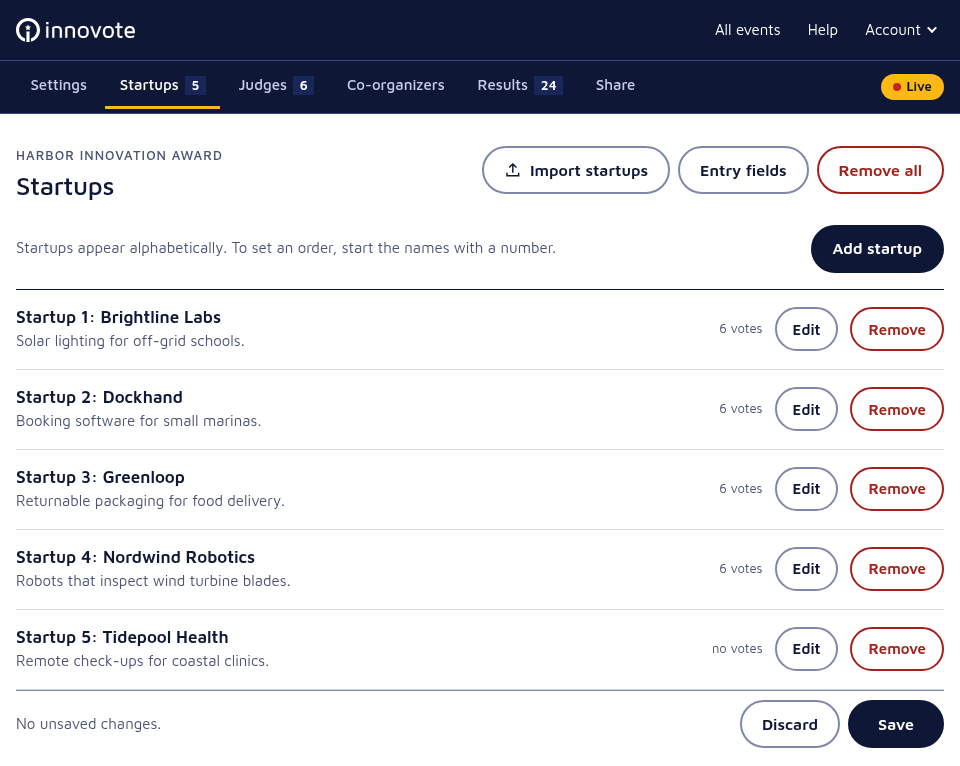
Upload a spreadsheet. Press Import entries at the top right and choose an Excel (xlsx or xls) or CSV file, or drop the file anywhere on the page. The columns are found by their heading, in any order: Name is required, and Description, Link, Video and Email are read when they are there. Point at the button (on a phone, press the ? next to it) for the column rules and the template. You see what the file holds before anything is saved, and the entries are added to the ones you already have. Save your other changes on the page first: importing reloads it.
Let teams apply themselves. Turn on “Activate the application form” in the settings and put its link in your call for teams: applicants fill in their own name, description, email and, if you turned them on, a website link and a video. Each application becomes an entry at once, there is no review step, and you can remove any entry afterwards.
Remove all removes every entry together with all votes. Only the owner of the event sees it, and you are asked to confirm first.
Add your voters or judges
Voters or Judges tab
What this tab shows depends on the sign-in type.
Username and PIN. Create a separate username and PIN for each judge.
- Username. A unique name for each person, for example a last name or
jdoe. Avoid names that are easy to guess, such as jury01 and jury02: anyone who knows your voting link can try them. - PIN. A new PIN needs at least 6 characters and is case sensitive. Spaces before or after it are ignored. Use a different PIN for each person.
- Generate PINs. Fills every empty PIN with a random one of 8 lower case letters and digits, without look-alikes such as l, 1, o and 0, so they are easy to type on a phone. Press Save to keep them.
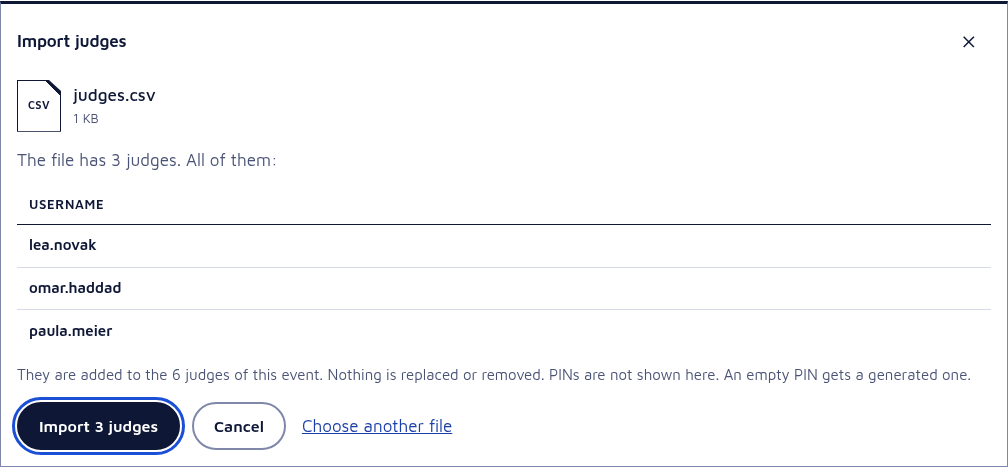
- Import. Press Import judges (or drop the file on the page): an Excel (xlsx or xls) or CSV file with the columns Username and PIN, found by their heading. An empty PIN gets a generated one. You see what the file holds before anything is saved. If some usernames already exist, you can import only the new ones.
- Remove all. Removes every judge together with their votes. Only the owner of the event sees it, and you are asked to confirm first.
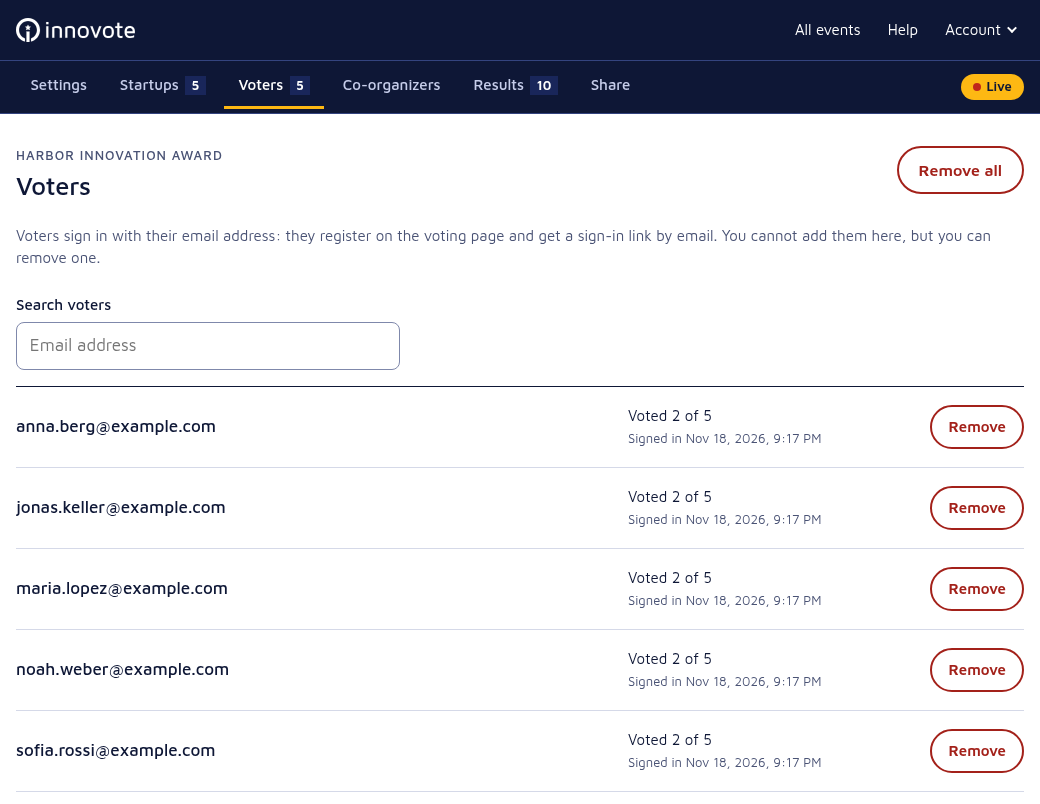
Email self-registration. The list fills by itself: people enter an email address, receive a personal voting link and vote through it. You cannot add anyone here, but you can remove a person, and Remove all removes every registered voter together with their votes.
How to hand out the PINs on the night: cue 2.2.
Logo, color and legal links
Settings, Voting page and Legal
The Voting page section decides what the people who vote see.
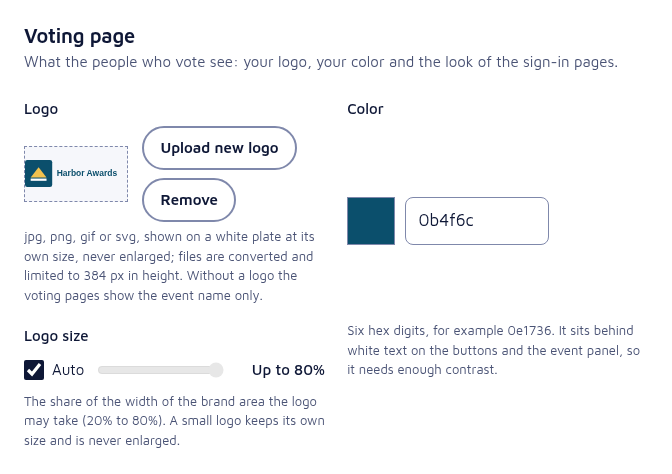
- Logo. A jpg, png, gif or svg file. It shows on a white plate at its own size and is never enlarged; files are limited to 384 pixels in height. Logo size sets how much of the width it may take, or leave it on Auto. Without a logo the voting pages show the event name only.
- Color. Six hex digits, or pick one. It sits behind white text on the buttons, so Innovote uses it only when it is dark enough to read (a contrast of at least 4.5 to 1 against white); otherwise the voting pages keep their dark blue and the settings say so.
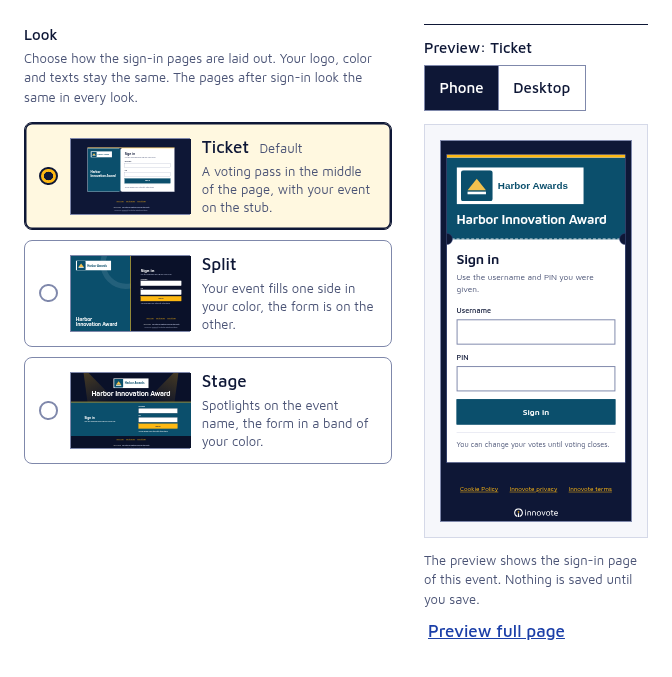
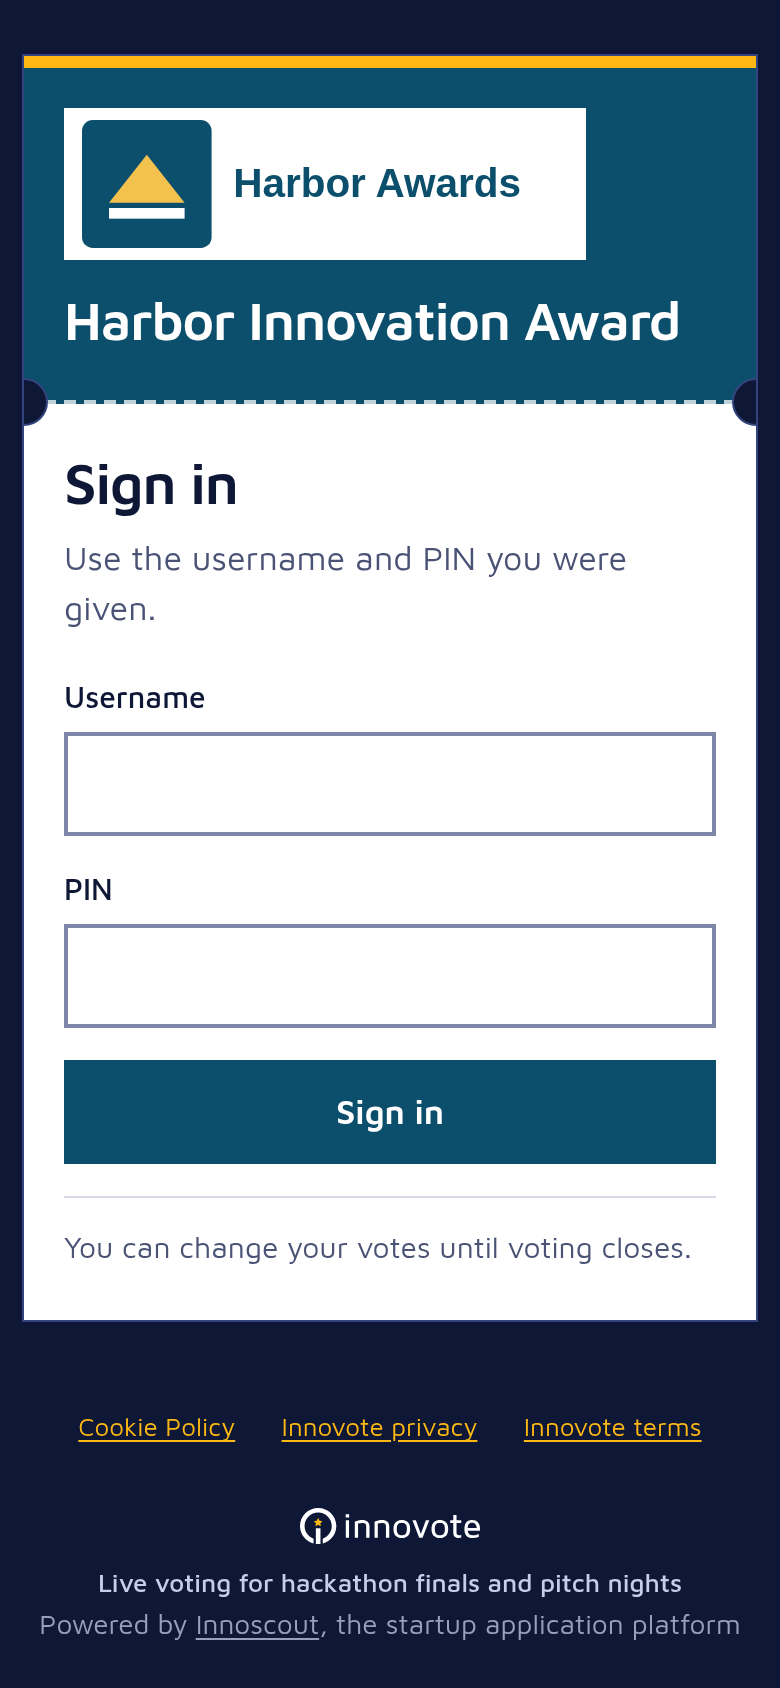
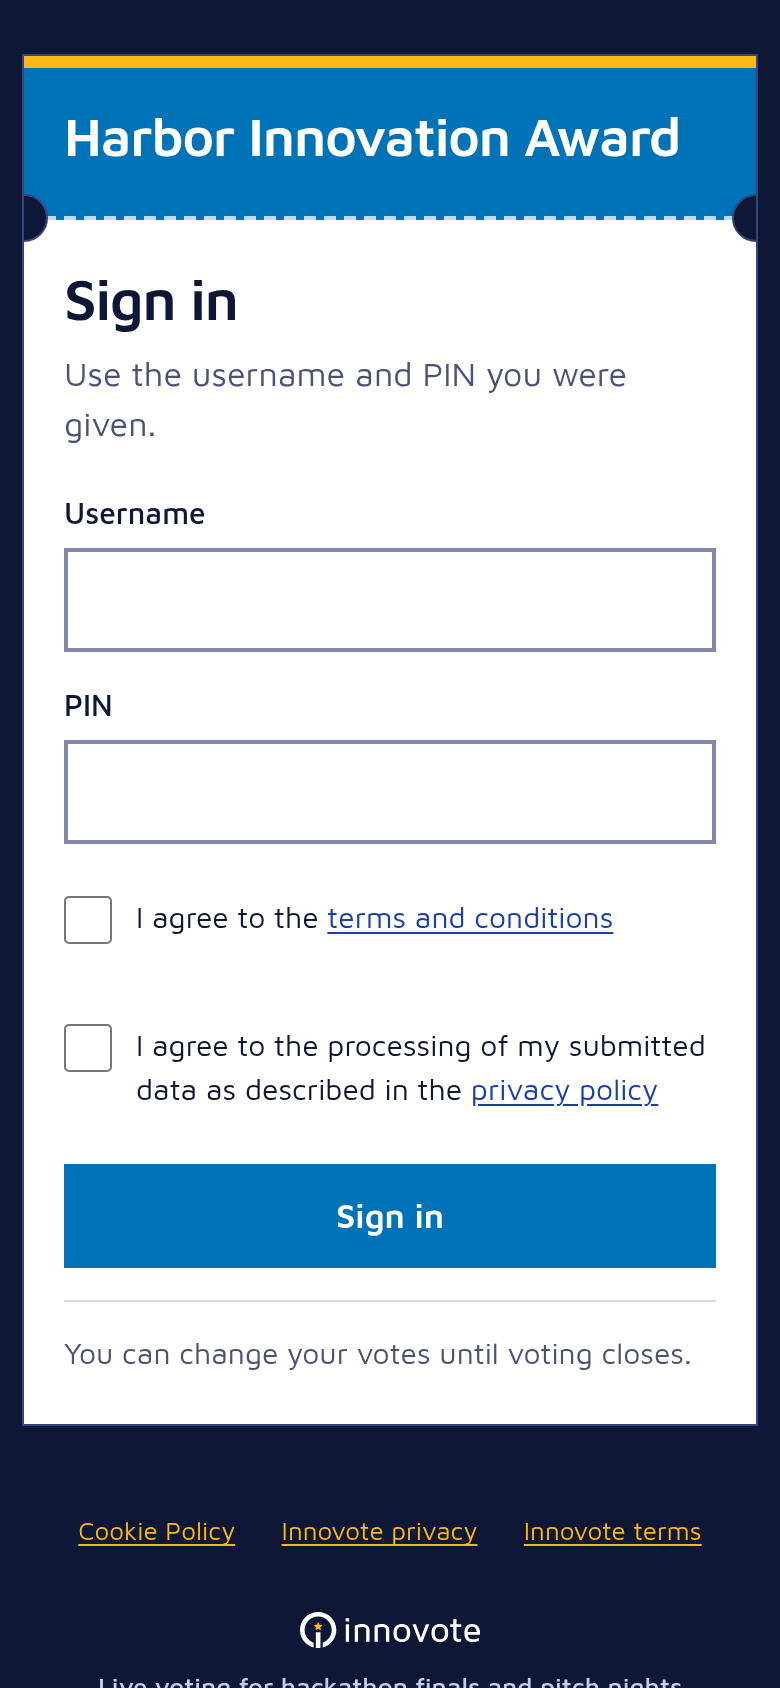
- Look. How the sign-in pages are laid out: Ticket (a voting pass in the middle of the page, the default), Split (your event fills one side in your color) or Stage (spotlights on the event name). The pages after sign-in look the same in every look. The preview shows the sign-in page on a phone or a desktop before you save.
- Favicon and sharing. Optional, below the look: the small icon of the browser tab, and the image and text that apps show when your voting link is shared.
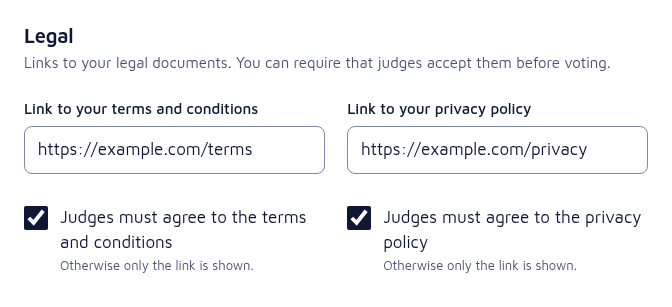
Legal links. If you need to show your terms and conditions or privacy policy, add the links in the Legal section. Tick “must agree” under a link to make voters agree to it before they can vote; otherwise only the link is shown. The links must start with http or https.
 Logo and color
 Scorecard
 Must agree
Invite co-organizers
Co-organizers tab (owner only)
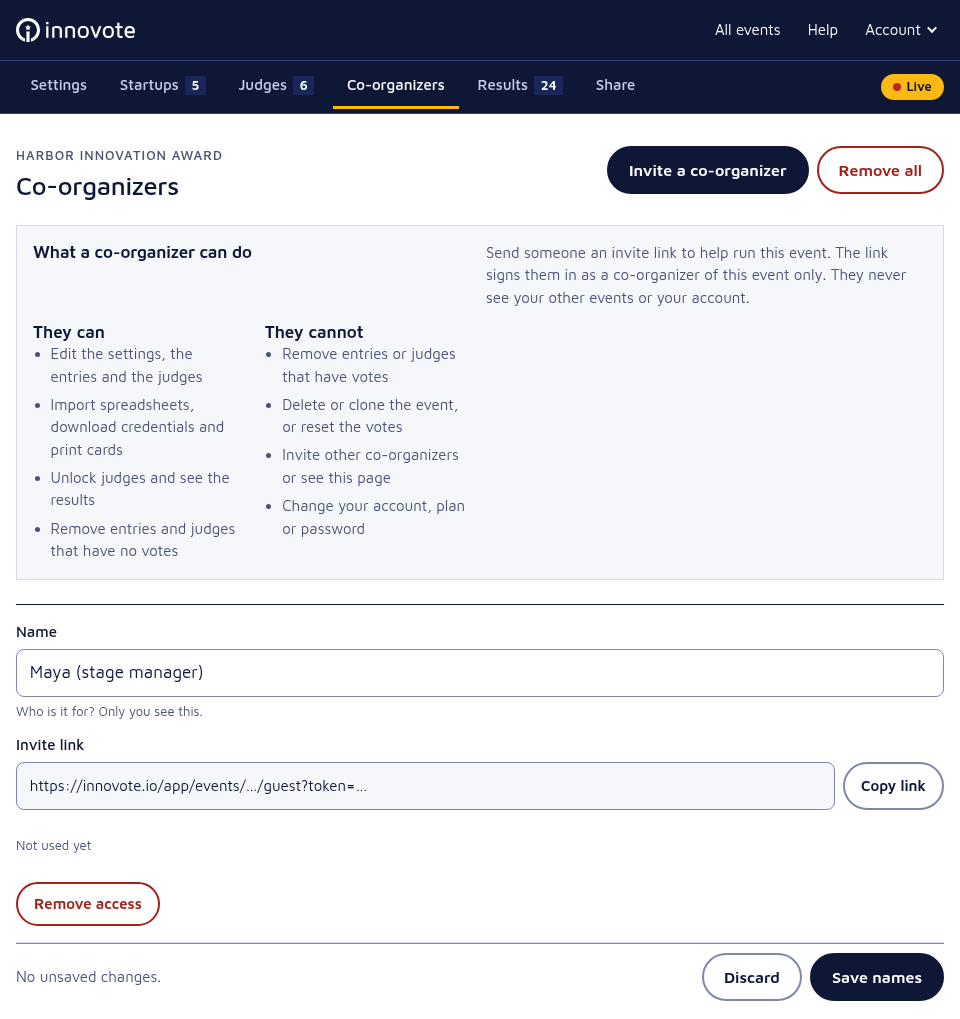
Invite a co-organizer gives you a link to send to someone who helps run this event. The link signs them in as a co-organizer of this event only; they never see your other events or your account. Give each link a name so you know whose it is, and see when it was last used.
- They can edit the settings, the entries and the voters or judges, import spreadsheets, download credentials and print cards, unlock people and see the results, and remove entries and voters that have no votes.
- They cannot remove entries or voters that have votes, delete or clone the event, reset the votes, use Send link to me, invite other co-organizers or change your account.
Remove access stops a link at once: whoever used it loses access to the event right away. You can invite them again with a new link.
Try it as a voter
Share tab
Try your voting pages before the event, ideally on a phone, so you know what judges and the audience will see. Switch voting on first (cue 1.1): while the event is switched off, the voting link shows “Voting is not open right now”.
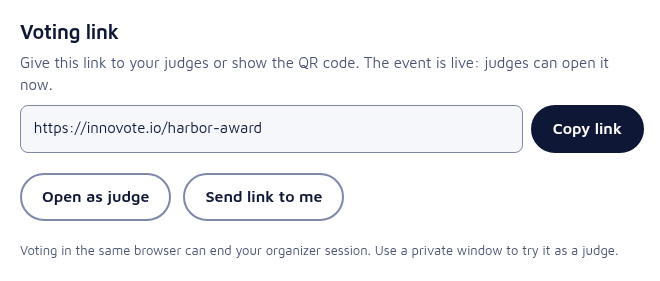
- Open as voter (Open as judge in a username and PIN event) opens the voting pages in a new tab. Voting in the same browser can end your organizer session, so use a private or incognito window.
- Send link to me mails the voting link to your account email address, so you can open it on your phone. Only the owner of the event sees it, and it sends at most 5 mails an hour per event.
For a username and PIN event, add yourself as a test judge first. Votes you cast while testing are real votes: the owner can remove them with Reset all votes at the bottom of the Results tab before the event starts.